
切换主题
PVE、KVM 虚拟机与 NAT 双栈网络配置
准备
- 大鸡一台
- 一个人
- 一双手
- 一键盘
安装 PVE
DD 重装系统
首先,进入 SSH,重装一下系统,这里使用 bin456789/reinstall 的 DD 重装脚本。
shell
curl -O https://raw.githubusercontent.com/bin456789/reinstall/main/reinstall.sh || wget -O ${_##*/} $_
bash reinstall.sh debian 12 --password 这里填写你的root密码 --ssh-key "这里填写你的ssh公钥ID (没有可不填)"
注意
安装PVE8必须是Debian12,如果要装PVE9,则需要Debian13。
安装基本包
shell
apt update
apt install curl sudo wget -y
安装 PVE
- 使用
oneclickvirt的install_pve.sh一键安装 PVE 脚本
shell
curl -L https://raw.githubusercontent.com/oneclickvirt/pve/main/scripts/install_pve.sh -o install_pve.sh && chmod +x install_pve.sh && bash install_pve.sh- 安装直到显示以下对话:
bash
Please execute reboot to reboot the system and then execute this script again
Please wait for at least 20 seconds without automatically rebooting the system before executing this script.
请执行 reboot 重启系统后再次执行本脚本,再次使用SSH登录后请等待至少20秒未自动重启系统再执行本脚本- 如文本所示,这时候只需要
reboot重启,然后再次连接等待 20s 后再执行一次脚本
shell
bash install_pve.sh- 然后会要求输入新主机名字:
bash
Please enter a new host name (can only contain English letters and numbers, not pure numbers or special characters, enter the default pve):
请输入新的主机名(只能包含英文字母和数字,不能是纯数字或特殊字符,回车默认为pve):
不修改默认回车就好。 然后等待安装完成。
- 当显示如下信息则已经安装完成:
plaintext
Running kernel: pve-manager/8.4.14/b502d23c55afcba1 (running kernel: 6.1.0-41-cloud-amd64)

Installation complete, please open HTTPS web page https://123.123.123.123:8006/
The username and password are the username and password used by the server (e.g. root and root user's password)
If the login is correct please do not rush to reboot the system, go to execute the commands of the pre-configured environment and then reboot the system
If there is a problem logging in the web side is not up(Referring to the page reporting an error, it keeps loading or is normal), wait 10 seconds and restart the system to see

安装完毕,请打开HTTPS网页 https://123.123.123.123:8006/
用户名、密码就是服务器所使用的用户名、密码(如root和root用户的密码)

如果登录无误请不要急着重启系统,去执行预配置环境的命令后再重启系统
如果登录有问题web端没起来(指的是网页报错,一直在加载还是正常的),等待10秒后重启系统看看
这时候就去访问信息中的链接地址就可以访问到 PVE 后台了,用户名是root,密码则是你ssh的root密码。
配置 PVE 宿主机的网络
[!警告] 确定能够进入 PVE 之后,再进行此操作。
使用一键脚本进行配置:
shell
bash <(wget -qO- --no-check-certificate https://raw.githubusercontent.com/oneclickvirt/pve/main/scripts/build_nat_network.sh)然后就会自动创建brige网络接口。 vmbr0负责 v4 的独立 IP,vmbr1负责复杂 v4/v6 的 NAT,vmbr2负责 v6 的独立 IP
注意
如果宿主机自带的IPV6是/64的,就不会有vmbr2。
部分独立服务器会分配多个 IPv6 /64 子网(例如 lidong A4),此时可直接通过 vmbr0 分配。
分 KVM 虚拟机
- 从 Debian 官方镜像站 下载云镜像。以下示例使用 debian-12-genericcloud-amd64.qcow2:
shell
wget https://cdimage.debian.org/cdimage/cloud/bookworm/latest/debian-12-genericcloud-amd64.qcow2- 接下来去创建虚拟机,填写虚拟机名称,然后
操作系统选择不使用任何介质: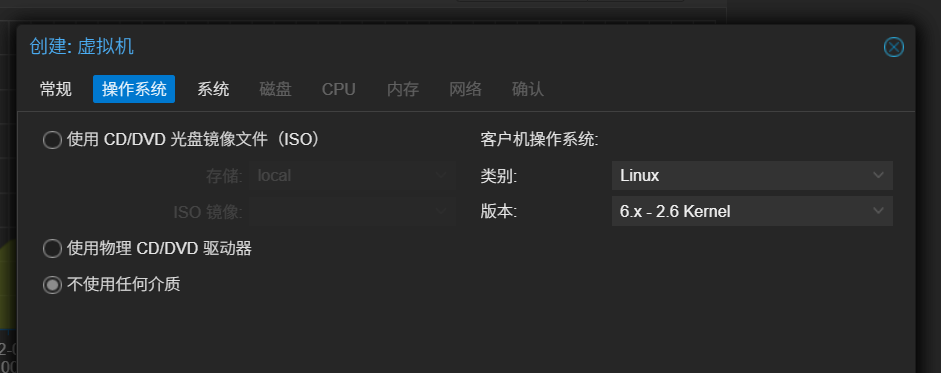
系统默认即可
磁盘 删除掉默认的硬盘,不需要添加硬盘: 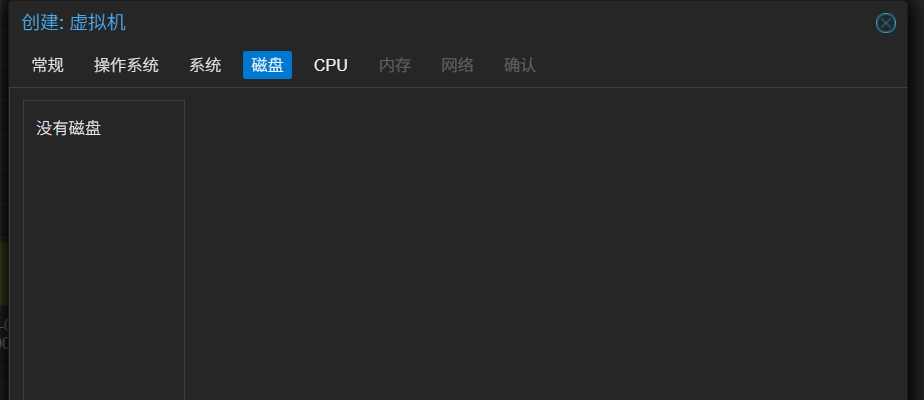
CPU根据需要选择,类别如需要高性能可选择host否则默认即可: 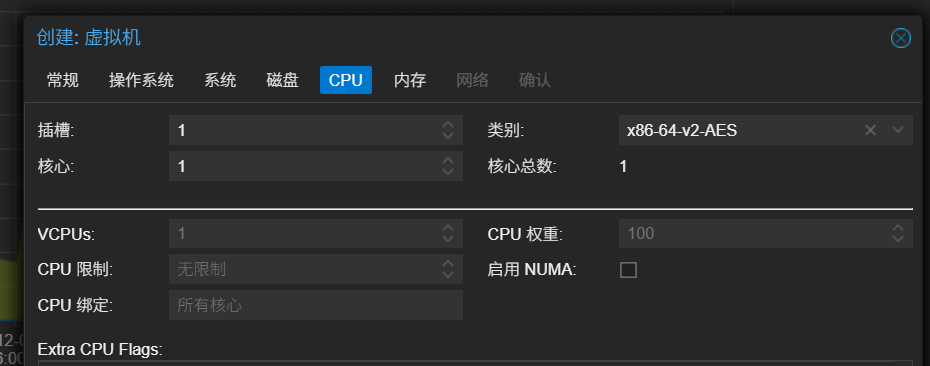
内存根据需要给就行: 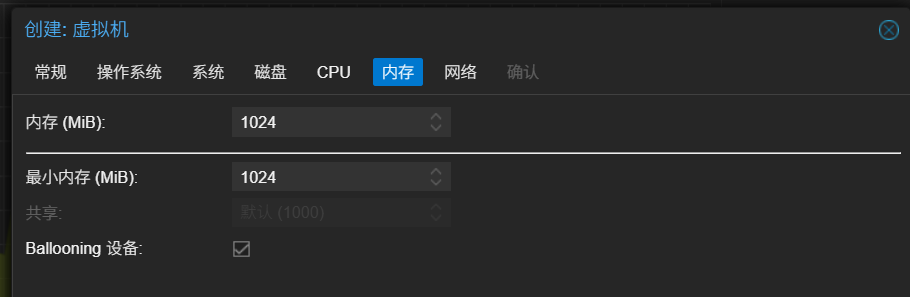
网络如果有多个独立 IPV4 选择vmbr0,如果使用 NAT,选择vmbr1: 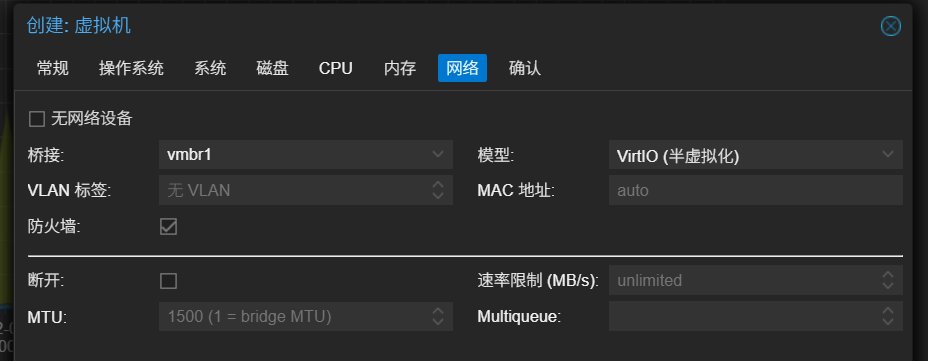
注意
防火墙需要关闭,不然 KVM 虚拟机可能会无法访问公网。如需开启防火墙需要去主机防火墙放行in
来源 IP 内网网段规则。
然后创建即可。
- 然后进入 PVE 控制台,将镜像导入到该虚拟机中:
shell
qm disk import 100 debian-12-genericcloud-amd64.qcow2 local --format qcow2100是虚拟机 ID debian-12-genericcloud-amd64.qcow2是镜像 local是本地存储
导入之后,进入虚拟机的
硬件,找到未使用的硬盘0,双击或者点编辑,然后添加硬盘,总线/设备可选VirtIO Block: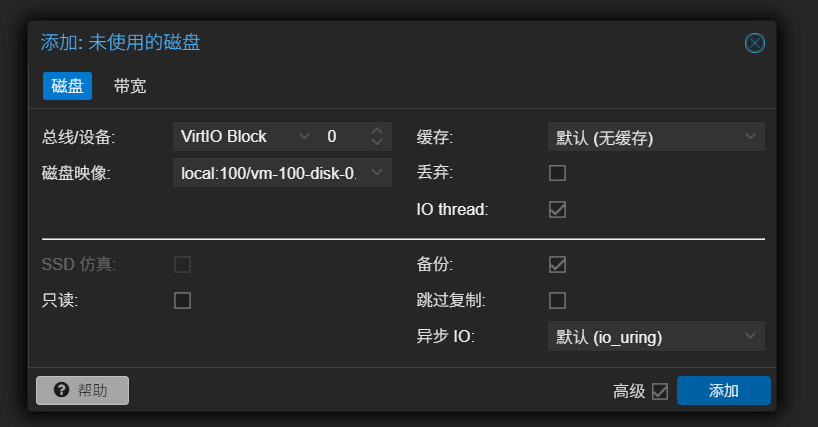
然后再选择硬盘,然后点击
磁盘操作-调整大小,输入要增大硬盘的大小: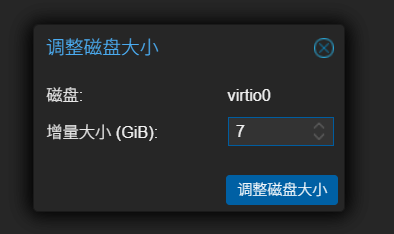
然后再点
选项,双击引导顺序,将virtio0硬盘启用,然后拉到第一位: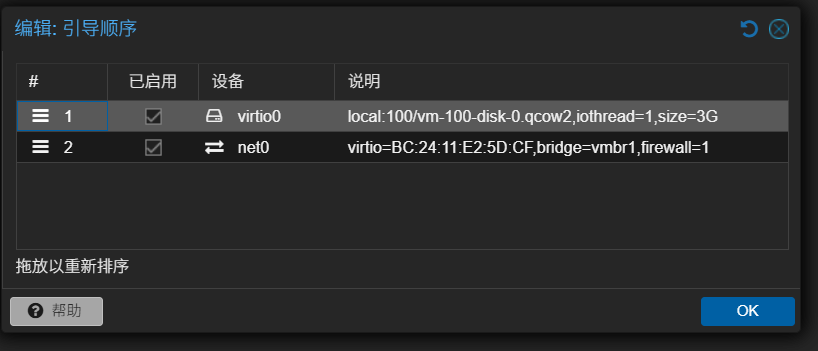
再回到
硬件,点击添加,选择Cloudinit 设备,然后添加: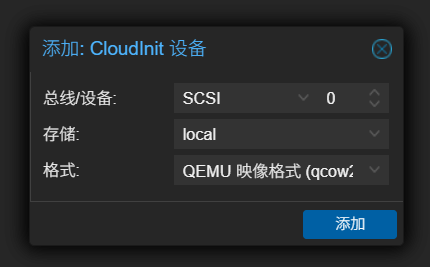
然后点击
Cloud-Init,然后可以设置用户、密码、SSH公钥、DNS服务器、IP设置按需设置,这里还需要讲清楚IP设置,NAT4 需要为虚拟机设置固定的内网 IP: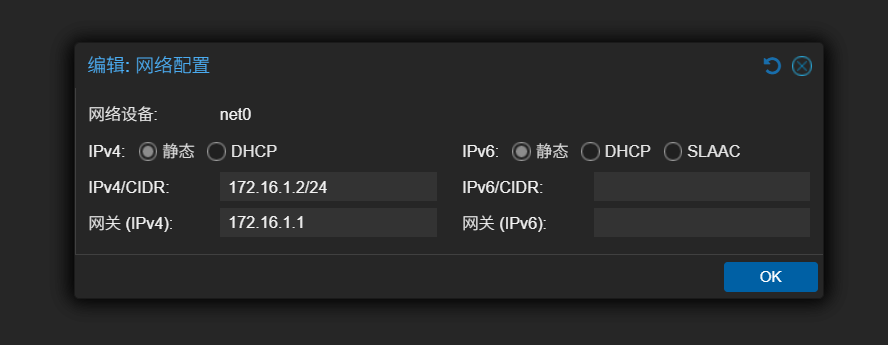
若虚拟机使用独立 IPv6,则无需配置 NAT6;如需 NAT6,请填写规划好的 NAT 子网。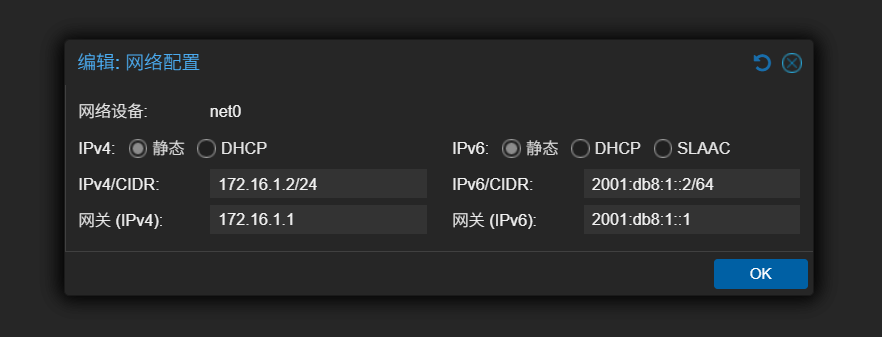
然后再回到
硬件,添加串行接口: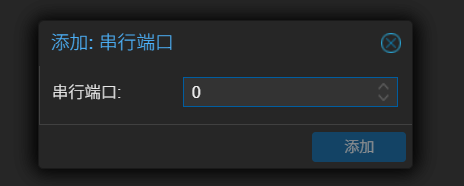
然后选中
显示,显卡换成串行终端 0: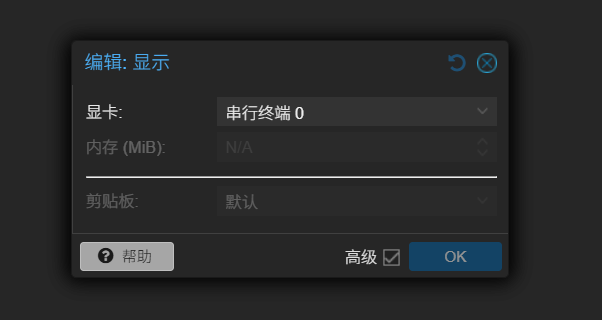
启动虚拟机,并验证网络、DNS 与 SSH 连接。
给 KVM 虚拟机添加独立 IPV6
- 在虚拟机
硬件中点击添加网络设备: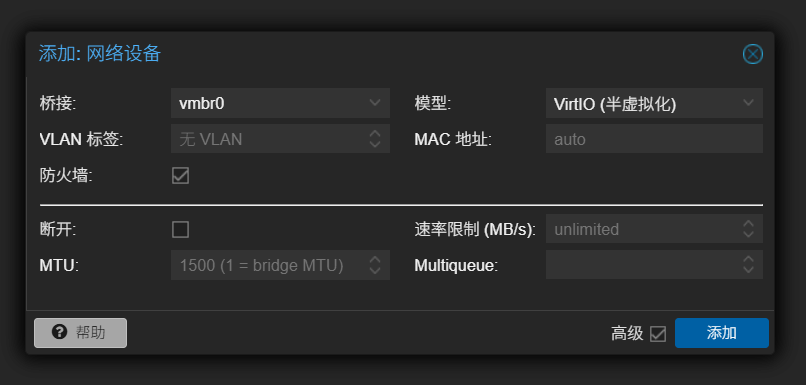
注意
桥接选择宿主机的vmbr0或者vmbr2,具体看宿主机的 IPV6 分配情况。
然后回到
Cloud-Init中,编辑IP配置(net1),设置静态的 IPV6: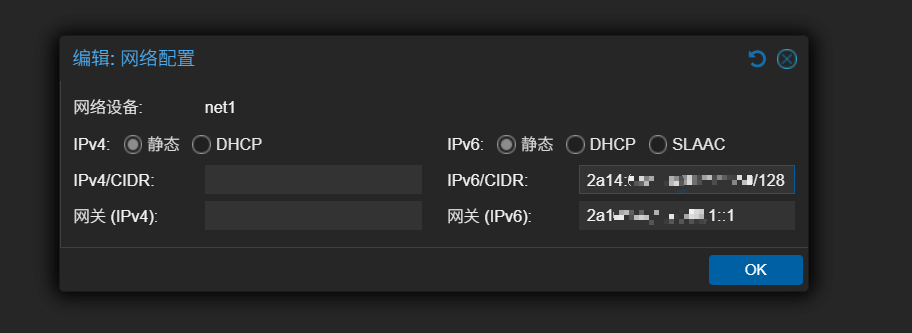
进入虚拟机,使用
ip.sb测试 IPV4 和 IPV6 是否正常:
shell
curl ip.sb -4
curl ip.sb -6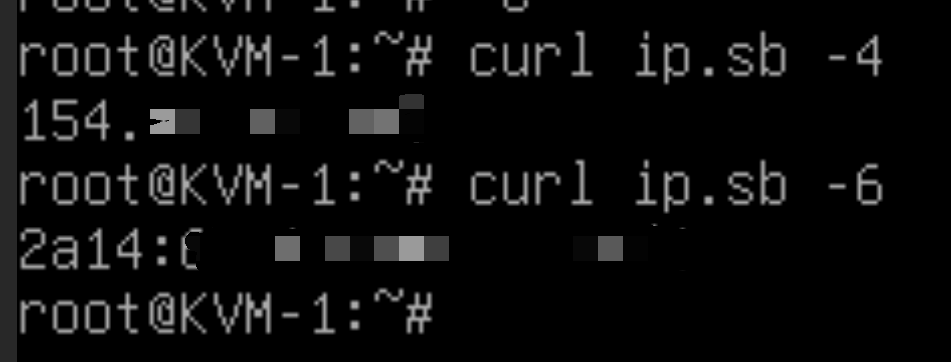
开启 ROOT 密码登录
进入虚拟机的
控制台,然后输入用户名和密码进行登录编辑
/etc/ssh/sshd_config文件
shell
nano /etc/ssh/sshd_config找到PermitRootLogin和PasswordAuthentication,去掉注释改成:
bash
PermitRootLogin yes
PasswordAuthentication yes然后按Ctrl+X,按 Y 确认然后回车保存,然后再重启 ssh 服务:
shell
systemctl restart sshdNAT 端口转发
- 使用
iptables宿主机上的端口转发到虚拟机的端口上
shell
iptables -t nat -A PREROUTING -i vmbr0 -p tcp --dport 10000 -j DNAT --to-destination 172.16.1.2:22dport 宿主机端口 to-destination 虚拟机地址端口
- 永久保存方法: 编辑
/etc/network/interfaces在iface vmbr1 inet static后面添加上
shell
post-up iptables -t nat -A PREROUTING -i vmbr0 -p tcp --dport 10000 -j DNAT --to-destination 172.16.1.2:22
post-dodwn iptables -t nat -D PREROUTING -i vmbr0 -p tcp --dport 10000 -j DNAT --to-destination 172.16.1.2:22
保存即可,然后重启网络:
shell
systemctl restart networking